Wednesday, November 21, 2012

Tickled with Ticking

Something about ticking fabric has always appealed to me. I suppose it's the simple, understated elegance and functionality of it. 


Originally, ticking was a tightly woven, (usually a twill weave) medium to heavy weight cotton or linen fabric whose pattern generally consisted of thin, dark colored vertical stripes on a white or beige background. True ticking was supposed to be so tightly woven that no light would pass through the weave.


That's because, way back when, when mattresses were stuffed with either feathers or straw, ticking was created and used as mattress fabric. It's close, tight weave and sturdiness was necessary in order to keep the pointy ends of feather shafts, or the ends of straw, from poking through the mattress and into the persons skin!       


Today, modern ticking fabrics are used for multiple purposes, and patterns are a bit more diverse. Also, unlike the original versions that were so densely woven, it can now often be found in quilt weight fabrics and sold alongside commercial homespun fabrics. (By the way, "homespun" gets it's name from fabrics that originally were spun and woven in one's home, as ticking might have been).


Now, when making these table runners, I wanted to keep the integrity of the ticking's simplicity. Thus, I focused on various ways to make an interesting runner without much, (or any) piecing.


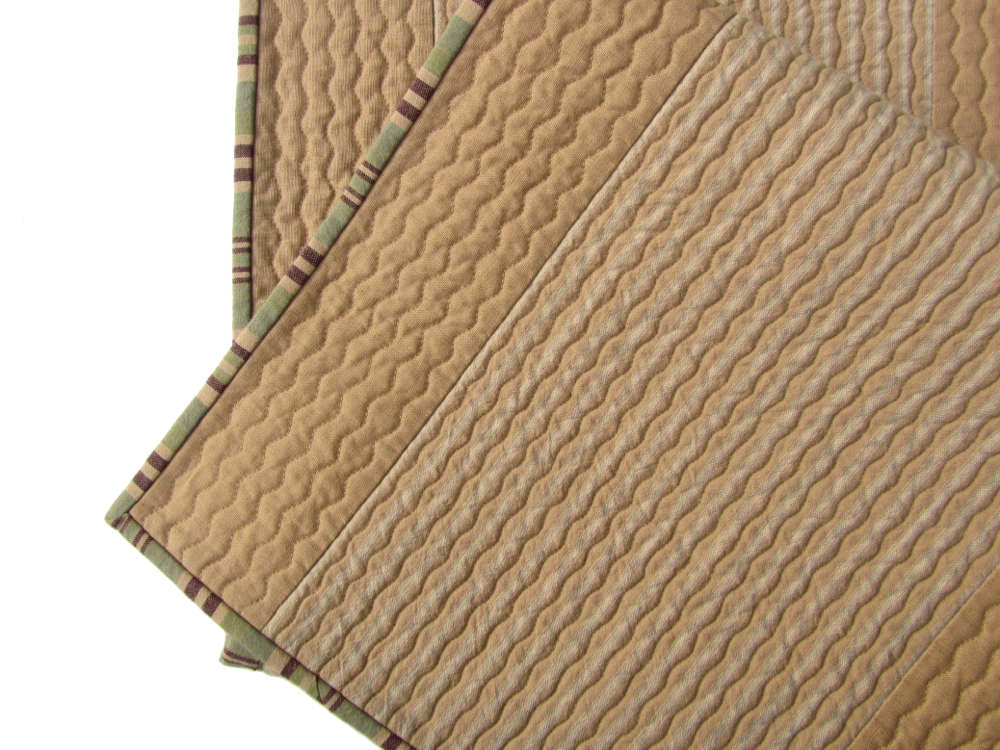
For the runner above, I kept the cloth whole. Then I quilted it with various wavy and straight lines that followed the pattern of the stripes. This added a fun pattern and texture, without competing against the pattern of the fabric. The chocolate shot-cotton binding goes nicely with the brown ticking stripes.


This runner also started out as a whole cloth, which I quilted in straight rows going down the center of each wide, tan stripe. I then added some patches in the same fabric, placing them cross grain and appliquéing in place with a zig-zag stitch. I then quilted the patches as well. A rust-brown shot-cotton binding helps add to this runner's rustic warmth.


For this last runner I began with a center panel of ticking, then edged it with two smaller panels of a linen/cotton blend. Once again, the quilting was kept simple as not to compete with the humbleness of the fabric. Thin wavy lines were quilted along the ticking and slightly wavier lines along the solid linen/cotton boarders. The multi colored striped ticking fabric that I used in the first runner worked great as the perfect binding for this piece.


For more information on any of these quilted ticking table runners, just click on the links below each one.  

And until next time...
Wishing you all a very Happy Thanksgiving!

Friday, November 16, 2012

The Beauty of Blue


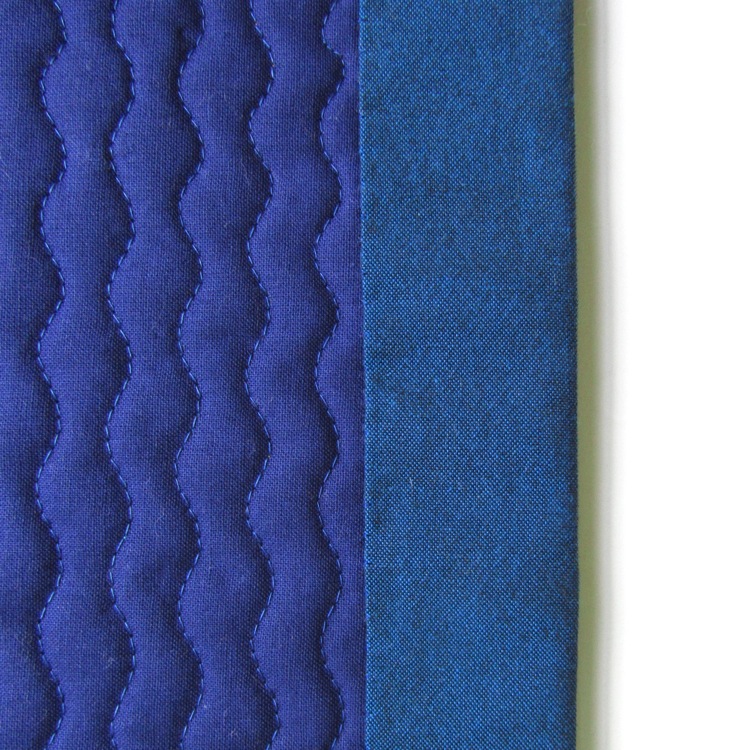
I found these beautiful, blue, made in Japan, Moda fabrics at my local quilt shop a few weeks ago, and absolutely had to add some to my stash. That faded and aged looking print is by far one of the best commercial prints I think I have ever seen!

Finding it hard to creatively focus with all of the stuff that went on this past month, I have decided to just keep concentrating on making some table runners for the immediate time being,  as I love their versatility and simplicity.


These blues are as soothing as can be, don't you think? They've got a good zen quality going on.


And speaking of blues, our yard has been filled with flocks of blue birds! We usually see them here and there from time to time, but we have never had flocks of them before. This lifts my spirits, as for years I have attached positive meanings with certain birds. They are kind of a symbol to me that all is well. Cardinals signify that I am on the right track, and blue birds, not surprisingly, symbolize happiness and joy... a reminder to really let go of my worries and count my blessings. 


Hmm... does that sound crazy or not? Do any of you have certain symbols that you look for as reminders that, as Robert Browning once wrote, "God's in his Heaven - All's right with the world!" If so please let me know in your comments, as I am curious.


As usual, you can find more about this runner in my shop. Just click here.

Have a great weekend everyone!


Monday, November 12, 2012

Thankful

Got the good news today that my biopsy results were A- OK. I am so truly thankful. Many heartfelt thanks for all of the understanding and kind words left after my previous post.

I am not sure why, but after years of these types of scares, (and as I said before all of them ending in good news) I truly think that this time I was just overcome with battle fatigue. When doctors work so hard to try to rule out and/or find cancer in you, (and God bless them for looking so carefully) it's hard to not after awhile start to believe that your number is indeed going to be called. And after I received my good news late this afternoon today, that is where my mind did go... to all the woman who didn't get the good news. To all the woman who already have, or will now have to, find the courage, faith, strength, energy, time and money to fight the battle of breast cancer. My thought and prayers go out to each and every one. And hopefully, one day, may our daughters and granddaughters not have to worry about such a disease.

Maybe now I can get the cobwebs out of my brain and post some work. A few new table runners are awaiting completion. I hope to post them soon. Again, many thanks for all the kindness you all have shown me with your caring and good wishes, and all-around niceness. I deeply appreciate it. xo

Friday, October 26, 2012

Patchwork Days


My apologies for my lack of posting this past month. My attention has been diverted by a somewhat familiar yet always unnerving roller coaster ride that I know many of you are equally familiar with...


It begins with those lovely words, "We are seeing some areas of concern on your mammogram and ultra sound", (I am screened by both every year).


Those words are then followed up by whichever next step in the diagnosis process they feel best suits the situation. Lots of waiting, wondering and insurance approvals lie in between.


So, as of now I am still in that diagnosis process, with one MRI behind me and another one in 2 weeks, along with a couple of biopsies. Fun, fun, fun! And that is why I haven't been sewing much or posting much... I have just been pre-occupied with other matters. I know you all understand.


But hey! Happily in the past the outcomes for me have always been good news. Here's hoping it's the same this time around! We do take it seriously though, as my sister was diagnosed with breast cancer at age 40. So, as we wrap up Breast Cancer Awareness Month, let me contribute my 2 cents and remind you all to go get your annual screening if you haven't already done so this year.


Now, I did manage to stitch up two new pieces... another Cross Quilt, which is made from some assorted muslin fabrics along with a few flowered print patches added for good measure. I like that this piece would work in a minimalist modern city apartment or a rustic farmhouse.


I also stitched up this pretty Patchwork Table Runner, made from some lovely Indian prints that I recently acquired. (Be ready to see more items from these prints... that is once I get my mo-jo back, as I adore them!)

Okie-dokie... so that's all for now. Think good thoughts and have a great weekend! xo

Sunday, September 23, 2012

Tutorial: Super-Duper Easy Way to Face a Quilt (Or: How to Sew a Non-Binding Binding)!

As promised in my last post, here is a tutorial on how I like to face a quilt. Facing a quilt is a way to bind your quilt without having the binding show on the front. It allows you to take the quilting all the way to the edge, can add a nice professional and more artful looking finish, (especially to a smaller quilt) and I also find quilts seem to hang better and flatter with this method.


Please keep in mind that this is just one way to face a quilt, and that there are many different methods out there. A lot of quilters prefer to use methods that create mitered corners, and you can find loads of tutorials on how to do that with a goggle search. However, I am extremely direction challenged and found them a bit too confusing for me!

The method that I use doesn't give you mitered corners, but who cares as they wouldn't show on the front anyway. And best of all it is simple, straight forward and super-duper easy, I promise!

I broke this tutorial up into 17 steps, (all really simple so don't be intimidated) and lots of photos, as visually I learn best that way, and I am guessing you do, too!

So, here we go....


Step 1: Begin with a quilt top that you have finished quilting. Make sure to square the corners and trim off any excess batting and backing fabric. Starting at the top and the bottom edges of your quilt, cut two strips of fabric each 2" wide and a wee bit longer then your top and bottom edges. (Note: For photo purposes, my quilt is turned on its side here). With your quilt facing right side up, pin each strip along the top and bottom, lining the edge of the fabric strip to the edge of the quilt, as seen in the photo above. (Note: I like to use solids, but if you are using a print for your facing strips you would want to sew the strip right side down).


Step 2: Using a 1/4" seam allowance sew both strips in place and trim the excess fabric edges flush with the sides of the quilt, as shown in the photo above.


Step 3: Flip the strips up and over to the side, as shown above. (If using a print the print would now be face up). Press with a hot iron.


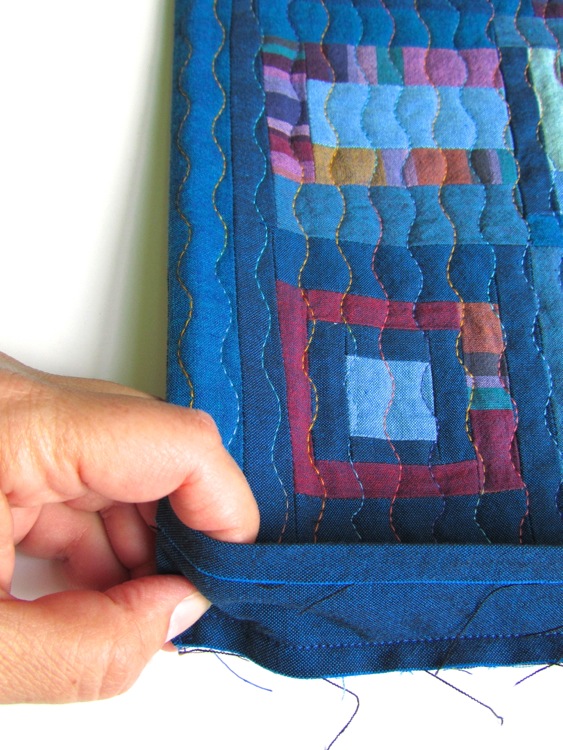
Step 4: Begin to fold the entire strip to the back of the quilt, as shown above. You almost have to roll the area that contains the seam allowance to get it to go backwards. As you are doing this, keep pressing with a hot iron, (I like to use a lot of steam, too).


The photo above shows what the front will look like once that strip is turned and pressed all the way to the back.


Here, the photo above shows how the edge of the quilt will look once the strip is folded back.


And this photo above, shows what the back will look like.


Very easy so far, yes?!

Okay, lets continue....


Step 5: Now you are going to flip your quilt over to the backside, and unfold those strips that I just had you so carefully fold and press! Using your hot iron and some steam, begin to turn and press the edge of each facing strip inward a generous 1/4" as shown above.  (Be careful to just press the edge of the facing strip, and not that quilted seam allowance, as we want to keep the "memory" of the pressed fold there for later).


Step 6: Flip your quilt to the front and your facing strips, too, so they are now back to where you started. Pin in place so they lay nice and flat along the quilt top, as shown in the photo above.


Step 7: Cut two more facing strips, again each 2" wide, but this time approximately 1" shorter then the length of your quilt.


Step 8: Center each strip along the sides of your quilt leaving approximately 1/2" on the ends, as shown above. As before, pin both strips to the sides, lining up the edges of the strips to the edges of your quilt.  Note: Once the new facing strips are pinned in place you can remove the pins from the first two strips.


Step 9: Begin stitching at the edge of the quilt, and using a 1/4"seam allowance, continue to stitch the length of the strip and past, going all the way to the other edge of your quilt. See photo above.


Step 10: Stitch each corner of your quilt. You will want to go right across that intersection, as shown above. This is to reinforce your corners for when they are turned. I like to stitch a line forward then another one backward, for extra strength.


Step 11: Trim each corner off, flush with the line you just stitched, as shown above.


Step 12: We are going to repeat a few steps here... As before in Step 3, flip the two strips that you just sewed over and away from the quilt and press. Then fold and roll the strips to the back as you did in Step 4 pressing as you go. Flip your quilt over to the back and unfold your facing strips as you did in Step 5 and press your generous 1/4" seam allowance along the edge of each facing strip. 

But now, unlike before, I want you to re-fold and re-roll these two strips back again to the back of your quilt. Steam press again to get everything nice and flat.


The above photo shows what the front of your quilt should now look like. The facing strips along the top and the bottom of your quilt top are still visible on the front, and the side facing strips are turned and pressed neatly to the back.


And the photo above shows what that those two newest strips should look like on the back side.

Yup... lot's of little steps here, but they are oh, so easy! And we are almost finished!


Step 13:  Flip your quilt to the backside, and pin those two strips flat against the back of your quilt, as shown above.


Step 14: Using nice small stitches, hand stitch each strip in place along the back of your quilt, as shown above, remembering to be careful not to stitch through to the front side. 


Step 15: We are in the home stretch now, baby! Using your forefinger and thumb, as shown above and below, push each corner right-side out. As you do this the two remaining facing strips on the front side of your quilt will naturally flip to the back of your quilt, where they belong.


Continue to push each corner out with your thumb. I then like to use a wooded chopstick to push the corner as far out as possible. 


Step 16: Once the corners are all pushed out and the facing strips are on the backside of the quilt, re-press along the edges with a hot iron, making sure everything is nice and crisp and laying flat, as shown above.


Step 17: As before in Steps 13 and 14, pin and hand stitch the two facing strips down to the back of your quilt, as shown in the photo above.


Ta - da! That's it! You are all done! 
Above, is what the quilt looks like from the back.


And here is what it looks like from the front.

Told you it was easy!

If you have any questions, ask them in the comment section and I'll do my best to answer them! xo

You can view more of my Tutorials HERE and my Patterns HERE.