Yes! I finally have a room of my very own!
For the last 15 years I have done the bulk of my work in an ever increasingly crowded and small section of our bedroom. This last year I found that it had gotten to the point where I could no longer think clearly, or create freely in that space. I had simply outgrown it.
Now, at the end of spring when my eldest daughter graduated from college and was making arrangements to officially move out on her own, I decided that it was time to make the move, turning her old room into my new studio. I was practically chomping at the bit.
But much to my surprise, the emotional act of doing so was way more difficult for me then I had ever imagined. This was her room, and claiming it as my own was a bit bitter-sweet. However, the realization that fall was right around the corner kicked my melancholy butt into high gear and I am so happy with the results!
Here's a little tour...

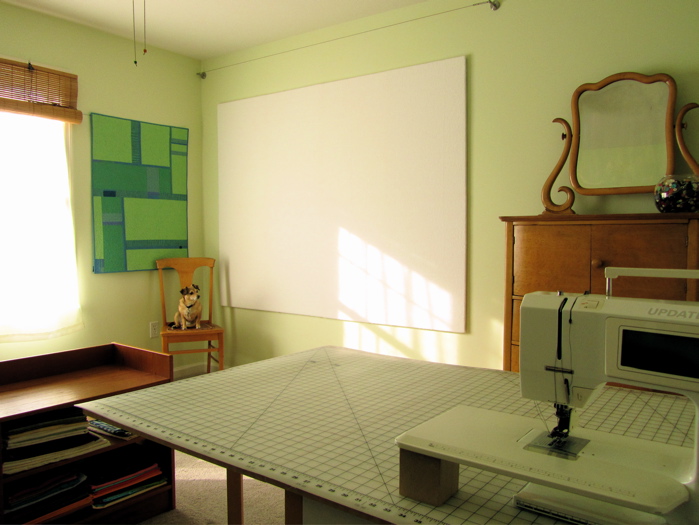
My goal was to create a space that: utilized furnishings which we already had on hand, provided different work spaces for various projects, be organized, and contain some open spaces. This was a challenge as the room is only 12' x 12' 10", and one wall is taken up mostly by a pair of windows, while another wall has odd angles and is taken by a closet and a door.
The above photo shows the office space; computer, printer, books, files, etc. As well as a cutting table and sewing space. The chair from the computer can easily swing around and be the chair used to sit at the sewing machine. The walls were painted a happy and calming soft yellow-green. (On my monitor they look more yellow in these shots, but in reality are actually more on the green side.)

The closet provides nice storage space for a lot of the items that cluttered up my previous space. It's wonderful to have them handy when needed, but quickly put out of view when not! As I sew I can keep the one door open and have easy access to threads, needles, presser feet, and scissors, etc. without having them strewn all over my work space.

Here is a second sewing area... perfect for small projects, or when my youngest daughter feels like sewing. Bowls of thread on top, and boxes of thread underneath. Fabrics that I use most frequently are stored on some low shelving. (Ironically the furniture in this section was bought 30 years ago by my parents when I moved out on my own and they converted my old bedroom into there new office space!) To the left of the machine, (covered in red) is my small metal vintage Structo Artcraft table top loom, which can be moved to the center of the table that it sits on and worked when the mood strikes. This area also has some open floor space, along with a nice view of our maple tree out front!

Besides just having a whole room to myself, the thing that I am most excited about is having a large design wall, which I have never had before and am oh so anxious to use! This was the only item, (besides wall paint) that I spent any money on. I pretty much followed the instructions found
here, on
Oh, Fransson! and am delighted with the results!
The only thing that I did different was that I substituted 8 smaller sheets of extra thick foam board, (found at the craft store) for the 2 large sheets of insulation foam board found at the hardware store. I believe this cost me a little extra cash, but as it was raining buckets at the time I went in search of materials, I was happy to forgo some savings in order to avoid the struggle of fitting long and large items into the back of my small Saturn station wagon.
The board is secured to the wall, (and believe me when I say that with held breath and crossed fingers!) with multiple strips of 3M Command Damage-Free Picture and Frame hanging strips, and for an extra gravity resistance measure I also hammered a few nails (wherever there was a wall stud) right under and along the base of the board, so it is actually able to rest on something.

Here's that odd angle I mentioned, but the space behind the door was just right for hanging my rulers. The vintage birdseye maple dresser is a favorite piece of mine, once belonging to my grandparents and provided extra storage space.

And here is Ellie, sitting on top of a matching vintage birdseye maple chair Notice the wonderful worn leather seat that replaced a broken cane seat. My grandfather put that on way before I was ever born and I just love it.
Ellie approves of the new digs and has volunteered to be the official studio mascot. Thank you Ellie!