Something about ticking fabric has always appealed to me. I suppose it's the simple, understated elegance and functionality of it.

Originally, ticking was a tightly woven, (usually a twill weave) medium to heavy weight cotton or linen fabric whose pattern generally consisted of thin, dark colored vertical stripes on a white or beige background. True ticking was supposed to be so tightly woven that no light would pass through the weave.

That's because, way back when, when mattresses were stuffed with either feathers or straw, ticking was created and used as mattress fabric. It's close, tight weave and sturdiness was necessary in order to keep the pointy ends of feather shafts, or the ends of straw, from poking through the mattress and into the persons skin!

Today, modern ticking fabrics are used for multiple purposes, and patterns are a bit more diverse. Also, unlike the original versions that were so densely woven, it can now often be found in quilt weight fabrics and sold alongside commercial homespun fabrics. (By the way, "homespun" gets it's name from fabrics that originally were spun and woven in one's home, as ticking might have been).

Now, when making these table runners, I wanted to keep the integrity of the ticking's simplicity. Thus, I focused on various ways to make an interesting runner without much, (or any) piecing.

For the runner above, I kept the cloth whole. Then I quilted it with various wavy and straight lines that followed the pattern of the stripes. This added a fun pattern and texture, without competing against the pattern of the fabric. The chocolate shot-cotton binding goes nicely with the brown ticking stripes.

This runner also started out as a whole cloth, which I quilted in straight rows going down the center of each wide, tan stripe. I then added some patches in the same fabric, placing them cross grain and appliquéing in place with a zig-zag stitch. I then quilted the patches as well. A rust-brown shot-cotton binding helps add to this runner's rustic warmth.
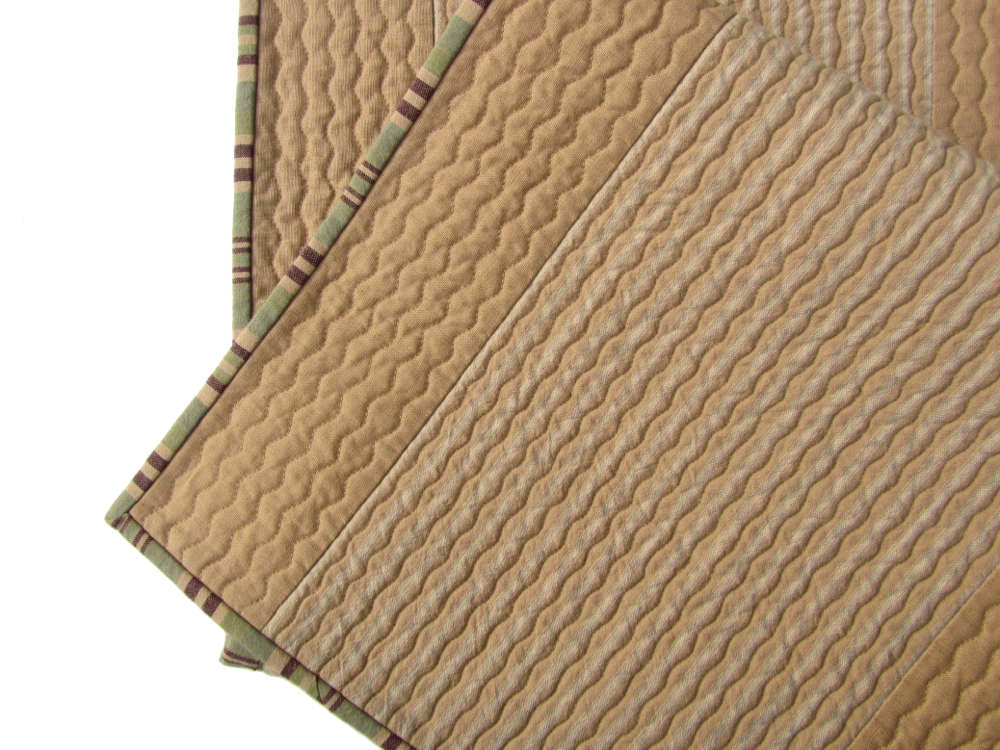
For this last runner I began with a center panel of ticking, then edged it with two smaller panels of a linen/cotton blend. Once again, the quilting was kept simple as not to compete with the humbleness of the fabric. Thin wavy lines were quilted along the ticking and slightly wavier lines along the solid linen/cotton boarders. The multi colored striped ticking fabric that I used in the first runner worked great as the perfect binding for this piece.


For more information on any of these quilted ticking table runners, just click on the links below each one.
And until next time...
Wishing you all a very Happy Thanksgiving!
15 comments:
Happy Thanksgiving Victoria. The tickinh table runners are awesome. Love the quilting and the appliqued pieces!
I love ticking too. Thanks for such an interesting post!
You make the most beautiful tablerunners I've seen - simple and elegant. I'm curious, your stitching is so consistent, do you quilt the wavy lines using free motion techniques, or do you use a walking foot, perhaps a wavy line decorative stitch? Thanks for the inspiration!
Like you, I love ticking - and I love what you've done with it here! :)
Victoria, you certainly have a God given gift for making quilts and such. Thank you for sharing.
Happy Thanksgiving.
blessings, jill
Simply beautiful!
These look ever so soft and gentle. Love the wavy quilting with the stripes!
Happy Thanksgiving to you, Victoria!
so lovely!
Your quilting is so perfect! How do you do it? I think your work is my favorite of all the quilters that I see! I love those lines!!
Thanks to each of you!
Kay and Kate, all the quilting shown on these runners was done using a walking foot. I use the edge of the walking foot to help guide my spacing, and I also use the stripes on the fabric to help guide me.
For straight stitching I usually set my stitch length a bit longer then the default setting - I like to set it between 3 and 3.5. I find elongating it just that extra bit creates a better machine quilted line.
As for the wavy quilt lines, they are actually done with a decorative stitch on my sewing machine that looks like a zig-zag stitch with curved points, instead of pointy points... if that makes sense! (It doesn't have a specific name in my manual, and is just listed as a "decorative stitch"). By elongating the length and playing with the width settings, I can make various elongated wavy lines. (I discovered this by pure accident one day when my hand accidentally bumped the length setting while I was using this particular decorative stitch!) Try playing around with your decorative stitches, adjusting widths and lengths, and see what you may have! :)
So soft and pretty.
You photograph them so beautifully, too.
I love these runners, your quilting is top notch!
Absolutely beautiful! So glad I found your blog.
i really like the one with the patches
Post a Comment